
If you’re working with a team of media buyers, designers, copywriters, or clients who are sharing landing pages, things can quickly get messy.
Maybe someone else is editing the wrong one. Maybe your developer must grant permission each time someone new is added. Or worse, all in one messy workspace.
That is why we created Multi-User Access and Workspaces, two features that are intended to facilitate collaboration within LanderLab quickly, neatly, and safely.
How to Create a Workspace in LanderLab
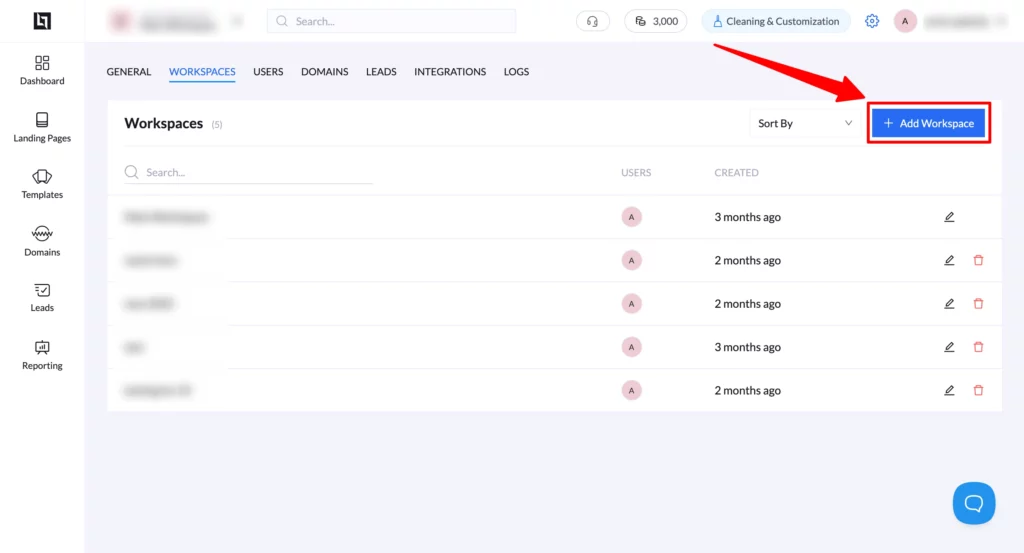
Workspaces help you keep campaigns and clients organized. Here’s how to create one:
-
Go to Settings → Workspaces.
-
Click “Add Workspace”.
-
Enter a name for the workspace (e.g., “Auto Insurance US” or “Client X – Nutra”).
-
Click Create — your new workspace is now live.
How to Add a User in LanderLab
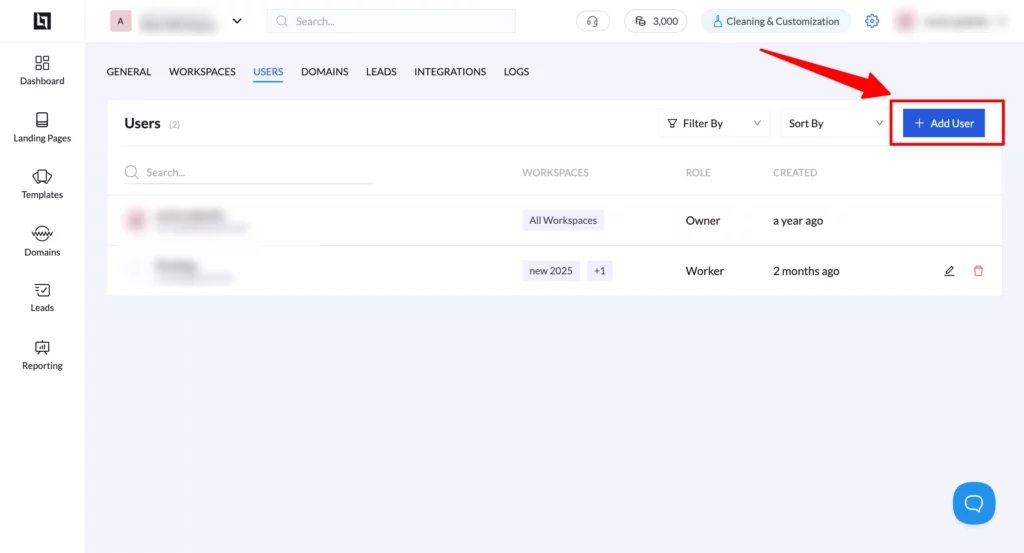
Giving your team access takes less than a minute. Here’s how:
-
Go to Settings → Users in the top menu.
-
Click the “Add User” button.
-
Enter the person’s email address.
-
Choose their role — Admin, Worker, or Viewer.
-
(Optional) Assign them to specific Workspaces.
-
Click “Invite” — and you’re done.

They’ll receive an email invite to join your workspace with the correct access.
User Roles
Give each team member the proper access level:
- Admin – Full control
- Editor – Can build and edit pages
- Viewer – Can see pages, but not change anything
Easy Setup
No developers needed. Invite users, assign roles, and select their workspaces all in a few clicks.
💡 Why It Matters
This update helps you:
- Keep client pages separate
- Control who sees what
- Move faster without confusion
Whether you’re running multiple offers, working across verticals, or managing clients, this helps you scale without chaos.
How to Get Started
Already using LanderLab? Head to Settings → Users to set up workspaces and invite your team.
New here? Choose your next step below.
")


